Showing posts with label Crafty Fun. Show all posts

12/28/11

Last minute decor

Several months ago, my friend Beth talked about a Pinterest find that featured old Christmas card pictures and numbered them according to the years.  I loved the idea but never found the time to get the pictures printed. She mentioned how much her kids loved looking at past pictures and it dawned on me... I kind of like that too :)


A few weeks ago, Shutterfly offered a great deal that included free prints! I quickly got our Christmas card pictures from the past and a few pictures from the years we didn't send cards printed, then used my Cricut to create a background. I finished them off with the years on the back.


My favorite part is seeing where we have been and what we have done each year we have been married. I imagine hanging them from our steps when we are in a larger home, but loved how welcoming they looked on our entry mirror.

I hope everyone had a Merry Christmas!

12/5/11

Dare to DIY- Homemade gifts

Dare to DIY

This week's Dare to DIY Challenge is homemade gifts!
My problem with homemade gifts is that I tend to kill a dead horse...
I make the same thing a billion times and it is no longer unique or fun, so I love this challenge to get new ideas!
My favorite homemade gift this year was inspired from Pinterest (of course!)
When I found this Christmas mantel this summer, I immediately knew I wanted to try to make one of the O Holy Night boards- so cute and such a perfect addition to any Christmas display.


I used a 1x6 piece of wood for the background and asked the hubs to cut, sand, and spray paint it. I used my Cricut and Sure Cuts Alot software to cut the letters, then modge podged them onto the board. I let everything dry, then placed a hanger on the back and voila!
We actually made our first board in August for my mother-in-laws birthday, but have made two more recently for a friend to give as Christmas gifts.
I also made one for Emily Ann's nursery- I love that any phrase can be appropriate. Simple and elegant.


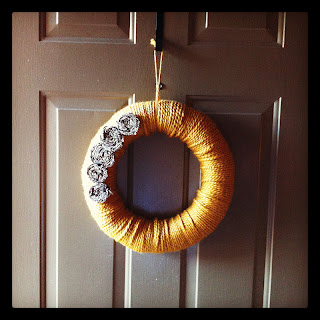
Another favorite homemade gift I am enjoying right now is the yarn wreath. I made a cute gold one for the fall, but wasn't quite finished with my obsession, so I made a Christmas one as well!


There are tons of fabulous directions around the blog world, but they are super easy and such a clean door decoration. The red on the door pops from the street- so much fun!

Have a great night friends!

11/20/11

Dare to... Entertain!

This week's Dare to DIY challenge is Dare to Entertain!

Dare to DIY

Brian and I began hosting a friend's Thanksgiving potluck dinner our second year of marriage. It is nice because it gives us a chance to pull out our fine china, try out new recipes, and spend time with friends. We have been with different people and done different things each year, but we always try to make it part of our Thanksgiving celebration. 

This year's dinner is tonight and I am so excited! There will be 10 people eating, so we had to be creative with our chairs- I was just excited we were able to fit 10 chairs around our table!


I started with my burlap runner and topped it with a more narrow brown runner. I used my new wooden candle holder (a freebie from a sweet friend!) and alternated each votive with either a flower or a candle. I had a few extra tea lights, so I used them around the candle holder. I also sprinkled coffee beans all over the table for a little fall feel.


We pulled out our fine china and silverware, but went with mason jars for drinking glasses. I really like the mix of the formal and casual and can't wait to find more uses for the mason jars! I wrapped our silverware in brown napkins, then tied a strip of burlap over them. I attached homemade place cards to each napkin with a piece of twine.


Once I was done with the table, I added a bit of festivity to our buffet as well. I hung my Thankful banner over the buffet.  Next, I placed a piece of wrinkled burlap on the corner. I topped it with our pumpkins and our letter J. I also added the two extra mason jars with flowers and a few more coffee beans to add congruency. We will put our desserts on the buffet!


Thanks for checking out our Thanksgiving table!

It's not too late to join the party! Head to Newly Woodwards and link up!
Next week's theme is Dare to... Eat Cookies! Can't wait to find some new recipes and bake some cookies!

Don't forget! 20% off everything in my Etsy shop until Tues., Nov. 29th! Coupon code Thankful!

10/31/11

Happy Halloween!

Happy Halloween!!

In honor of the day, I am sharing my Snowy White Owl Cupcakes. 
They are a variation of the Owl cupcakes from Pinterest, but when I started thinking about them, I realized two things...
 #1- I don't like chocolate icing
 #2- the only owl I truly care about is a snowy white owl that became one of Harry's best friends in Harry Potter and the Sorcerer's Stone- Hedwig!


These were a super quick treat. I used chocolate cake mix and a can of white icing. Crack open some Oreos (the hardest part.. it's so difficult to get the icing to separate smoothly!), place brown M&Ms in the middle, and finish with a piece of candy corn! We brought some to a party on Friday night and plan to bring the rest to a party tonight- so much fun!

Speaking of candy corn...
Isn't my little piece of candy corn adorable? :)

Happy Halloween friends! Have a spoooooooky day!

10/18/11

Infinity scarf

Earlier this week, I was looking through some favorite blogs and found the infinity scarf via Kelsey's blog. It sparked my interest. So very cute. 
See...

After exploring a little more, I found a few great tutorials on an DIY infinity scarf. Turns out, they are really easy to make! I grabbed an old shirt of Brian's and made my own. A cold front is coming through tonight and I can't wait to pull out my new scarf for the change in temp!


Want to make your own Infinity scarf? Here are fabulous and did I mention, SUPER EASY, directions!
Have a great night!

10/15/11

Door decor

I need to begin this post by informing you that I have a Pinterest problem.
It's so incredibly addicting and I continually find projects to work on- though they take much more time than they used to.

My most recent find was the yarn wreath. 
It all started at the hospital. The day after EA was born, I was dying to get out of the room, so I took a stroll around the halls to look at all the door hangers. Some were cute, some were subpar.... 
then I found this jewel..
So so cute. Classy. Simple. Ahh and the obsession began.

When I finally began functioning again, I decided to see what I could find on Pinterest and online in the way of yarn wreath tutorials and found some precious wreaths. See...


 This week, I finally got started making my own and found it was so easy! All you need is a straw wreath form, yarn, and hot glue, plus whatever embellishments you want. Wrap and glue, wrap and glue. 

Here is my version of the yarn wreath-

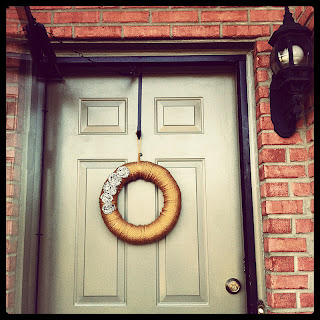
And on our door...

Happy Saturday!

Linking up to Tatertots & Jello!

2/20/11

Knit Day

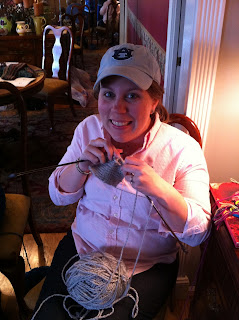
I went to a friend's house to knit yesterday. I knitted at the end of my time at Auburn, but hadn't picked it up since I graduated. It was like riding a bike! 


I used much smaller needles than I ever had before, so the little piece of scarf you see in the picture took 3 hours to make. About 5 minutes after this picture was taken, I undid all my hard work and started again with larger needles. I can't wait for my finished product!

Happy Sunday!

10/23/10

A fall alternative to flowers

My sweet friend Elizabeth recently got a new job. This is something she has been looking forward to basically since I have known her, so I wanted to help her celebrate. 
Only I had Dave whispering in my ear- budget Ashley, budget!
Stupid (but oh so smart) Dave.

After school on Wednesday, I went to Western with the purpose of buying a cupcake. 
I walked out with a pumpkin.
You can't deny, they are just cute. And appropriate for fall!

This is what Elizabeth ended up with...


It wasn't much, but I thought it turned out cute!
Happy Weekend my friends!

10/7/10

Dave Ramsey

Brian and I are going through Dave Ramsey's Financial Peace seminar at our church right now. 

When it comes to finances, boy howdy, does he know his stuff!

Over the past several weeks, we have seen several areas we need to focus on to gain a better hold of our budget. Part of this includes his envelope system. (I can't lie, sometimes I get debit swipe happy and forget to document- oops!)

So, I have been itching to create something with my Cricut and found a great pattern for different sized envelopes. I have seen several cute Dave Ramsey envelopes in various places online and decided to create envelopes of my own! I picked my favorite paper from my endless supply of scrapbook paper, chose letter colors, cut, laminated, and voila!


I'm not sure how well they will hold up, but right now, they are making me want to save money.
Or at least use cash. 
:)

Linking up here!

8/7/10

Cricut Dreams

Last Martin Luther King Jr. weekend, Brian and I went see our great friends Brad and Katie in Demopolis. Aside from a wonderful time of fellowship and catching up, I was introduced to the Cricut. We spent the weekend finding creative ways to use it. I fell in love and began dreaming of great and fabulous things I could do with it- gifts, classroom, our house, a future nursery. Nothing seemed too big or small for the Cricut.

For our anniversary, my sweet Brian gave me a Cricut. I am beside myself! I have been in heaven creating things for my classroom and am anxious to try cutting fabric and vinyl. I have worked for hours making a word wall and letters for my bulletin boards.
We recently had a new teacher join the 2nd grade team at our school. Aside from the fact that she is Godly and wonderful, she is also VERY creative and fun. As she was setting up her classroom, she hung a painted canvas on the wall to add a homey feel. I decided I needed to do that in my classroom as well and was determined to use my Cricut. After browsing the aisles of Hobby Lobby, I came home with black paint and bright polka dotted paper (I had the canvases at home.)
My final project?


They look awesome in the room, but could also be useful in a playroom one day. I have cut out the words "be creative" and "make good choices" too, but am completely out of black paint. I hope to do those later this week. I have a lot more work to do before I am good at the Cricut, but I am loving the chance to practice! Hopefully you will see more Cricut projects here in the future!

3/8/10

100th Post and a Giveaway!

Happy 100th Post!

As a
for reading, I am featuring my first giveaway!

As I have mentioned before, I love crafts and DIY projects. I recently made some button ponytail holders that have recieved so many compliments, I thought I would share the love. For this giveaway, I am choosing one reader to recieve a ponytail holder covered with the fabric of their choice (see examples below) and two pairs of button earrings.


To enter, leave a comment stating your name, an address to your blog or email address (so I can contact the winner!), and the number fabric you like the best. For an additional entry, become a follower, then leave a second comment. I would love to read about you and become bloggy friends!

I will draw a winner on Monday, March 15th!
Thanks again for reading and good luck!
Have a blessed week my friends!

1/23/10

DIY Ponytail Holders

I am a ponytail girl. Don't get me wrong, I wish I could wear my hair down, just plain down, but I can't. I know, I've tried. Therefore, any ideas on making a cuter ponytail is a winner in my book.
As I was browsing old DIY Days on A Soft Place to Land, I found this link at Great Oak Circle. Covered ponytail holders! Simple, very inexpensive, and adorable! You can't beat it!
I started with basic colors and made two, but I know this isn't the end for my ponytail decor. I am thinking orange and blue polka dots for Fall and bright flowers for Spring. I just love them!
Happy Weekend my friends!

1/11/10

DIY- Love wreaths!

It has been wreath/ hanging item frenzy at my house recently. I have been very bored with my decor since we put away our Christmas decorations and needed something to hang. I am very pleased with the results!

My first project was a moss monogram. I used fabric moss and a card board letter. I traced the letter onto the moss (front and back), then cut it out. I hot glued the moss fabric onto the letter and added a ribbon! I had trouble finding a home for it, but have now placed it on the mirror in our living room.

I found my next project on last week's DIY Day at a Soft Place to Land. Check out this fabulous tutorial at Where the Heart Is to make an adorable burlap wreath for your front door!
I am linking up to Kimba's DIY Day and Strut Your Stuff Thursday at Somewhat Simple!
Have a glorious evening my friends!

12/6/09

Dare to DIY- Homemade Gifts!

This week at the Newly Woodwards, it's Dare to DIY- Homemade Gifts. I am a huge fan of homemade gifts. I am one of those people who walk through stores, look at things, and say- I can do that. Then, I either forget about it or mess it up terribly. But it is always fun to try
Paper Covered Frame
My first DIY gift is my paper covered picture frame. I usually buy messed up frames from the clearance aisles of TJ Max or Hobby Lobby since the frame will be covered anyway. That makes this project super inexpensive. I cut the paper the estimated size, then crease the edges to fit it perfectly. I use modge podge to stick the paper to the frame, then put a layer on top. Finally, I use sand paper to smooth the edges. A wonderful friend showed me this several years ago and I still can't get enough! When I went to Christmas Village in November, I saw these frames with a large bow on the top. It was really cute and a great frill to the frame.
Big Sister Shirt
Another teacher on my team is due at the end of this month. When she saw my shirts for my student and her brother, she mentioned she wanted one for her two girls. I really liked the way the shirts turned out last time, but wasn't a fan of the white. This time I used the dark shirt iron ons. It took at least four prints (Word of caution, read the directions on the iron on package- all of them are not like the Avery brand.) When I finally got my patience back, they turned out really good!
Paisley Canvas
Another friend is due in Febuary, so I created a master piece for the nursery. They are using chocolate and primary colors, so I went for the red and brown theme. I painted the background, then used stamp/ stencils for the paisley. I picked a favorite font (Pea Stacy from Kevin and Amanda) and traced it on. When I was finished, I added the fringe on the edge. This was very similar to this previous project.
Cross Picture
As I mentioned in a previous post, I saw something similar to this at Hobby Lobby and wanted to try it out. I used a 5x7 canvas and modge podged a favorite paper. I used a cross from HL and hot glued it on. Finally, I matted it and framed it. I gave one to my GMiL on Thanksgiving Day and she LOVED it. It wasn't as cheap as it could have been, but I personally think it turned out better then the ones at Hobby Lobby.
Thanks for coming by friends! I am looking forward to seeing more crafty ideas!

11/29/09

Dare to... Eat Cookies!

This week's post at the Dare to Do It Yourself Blog Party is Dare to... Eat Cookies! I feel like I have been baking a lot of cookies lately. I am not sure if it is the holidays, football season, or just because I can, but I have certainly been in the baking mood. My new favorite cookie recipe is from Bakerella. They are called Cowgirl Cookies. She actually used the recipe as a jar of dry mix gift set, but I decided to try out the real thing. You can see Bakerella's cookie jar idea and exact recipe here. Though I am not sure this is a true show of how good they are or not, my husband, who rarely eats sweets, is IN LOVE with these cookies and asks me to make them all the time. Maybe this is why I am baking cookies so much. Anyway, on to the recipe!
Cowgirl Cookies
Ingredients
1 1/3 c. all purpose flour, 1 t. baking powder, 1 t. baking soda, 1/4 t. salt, 1 c. cooking oats,
3/4 c. M&Ms, 3/4 c. semi sweet chocolate chips, 1/2 c. brown sugar,
1/2 c. white sugar, 1/2 c. of nuts (optional), 1 slightly beaten egg,
1/2 c. butter (melted slightly), 1 t. vanilla
Directions
Mix all the dry ingredients in a large mixing bowl. Add wet ingredients. Mix well. Roll the dough into balls and place on cookie sheet.
Cook at 350* for 10 minutes.
I made a batch to give as an early Christmas gift for family. I went shopping, came back, and this was all that was left.
Here's why.
Oh well, at least he likes them, right?
Have a great week friends!

11/28/09

DIY Big Brother/ Big Sister Shirts

A week or so ago a mom of a student in my class had a baby. I wanted to give my student something that would show her I was thinking of her and also help her to feel special, but struggled to find just the right thing. Then it hit me- a Big Sister shirt!
The baby was born on a Thursday and of course I waited until the very last minute to make it, but it turned out fabulously! I created the picture then printed them out on an iron-on. It was quick, simple, and inexpensive and she (and her brother) loved it! They wore them to school the following Monday and looked precious!

11/15/09

Dare to DIY- Be Thankful

I am so excited because today starts the first week of the Dare to DIY. The theme this week is Be Thankful. Our assignment was to do a Thanksgiving craft of any kind. I have been really into cupcake decorating this Fall and when we had people over to watch the Auburn vs. Georgia game last night (terrible ending BTW), I knew I had decorate Thanksgiving cupcakes.
I used cake mix and white icing for the basic cupcake design. Several weeks ago Hobby Lobby had a 40% off sale on Halloween things, which included this great Wilson Decorative icing in orange, black, brown, red, and green. I wasn't sure why the red and green were for sale, but I certainly didn't complain. I bought WAY more then I should have, but at least I got it at a great price!
I used the brown for the turkey's body and the other three colors for the feathers. The hus said turkeys didn't have green feathers, which I know, but I still had the icing and wanted to use it. I used a bit of red for the beard and chocolate chips for the eyes and voila!
I also used the green icing to write Give Thanks. I set them up on my awesome cupcake stand in a very festive style.
I made 24 cupcakes yesterday and by 7:00 tonight, they were all gone. I guess they were a hit.
I loved our first DIY Project! Though it is not a craft that lasted, I was proud of the result!
Have a great night my friends! I am looking forward to seeing everyone's DIY Project!
Related Posts Plugin for WordPress, Blogger...